What Is trezor.io/start?
trezor.io/start is the official onboarding portal by SatoshiLabs for setting up a Trezor hardware wallet (e.g. Trezor One, Trezor Model T, Safe 3, etc.). It’s the trusted place to:
Download the official software (Trezor Suite)
Ensure firmware updates and authenticity checks
Initialize your device: create or recover a wallet
Set up security features like PIN, passphrase
Get guidance for safely backing up your recovery seed
Begin using the device to send/receive crypto in a secure way
The goal is to make sure new users begin with the correct, secure flow so that they avoid critical mistakes (fake software, lost seed, etc.). Trezor Help+2Trezure FAQs+2
Why Start at trezor.io/start — Security & Risk Mitigation
Before walking through the setup, it helps to understand why using the official start page is so important. Some of the most damaging problems in crypto happen because of insecure onboarding.
Phishing / Imposter Sites
Many attackers build fake sites that look like official ones, trying to trick users into downloading malicious software, entering their recovery seed, etc. Going to trezor.io/start (typing it yourself) helps avoid these traps. Teachable+2Help Base Start+2Authentic Software Only
The portal ensures you get links to Trezor Suite (official desktop/web app) or necessary support tools (e.g. Trezor Bridge if needed) from verified sources. Using non‑verified binaries or old/outdated copies can open up vulnerabilities. Trezor Help+2Trezor Help+2Firmware Updates & Verification
Devices may ship without up‑to‑date firmware. The setup flow via trezor.io/start prompts you to install the latest firmware, ensuring known security fixes are applied. Also, the device authenticity (e.g. verifying the bootloader, firmware signature) is checked. Teachable+2Trezor Help+2Secure Backup of Recovery Seed
The recovery seed is the only way to restore your wallet if the device is lost or damaged. If it is mishandled (e.g. stored digitally), that creates huge risk. The guide enforces safe practices: writing down on paper, verifying backup, storing safely. Teachable+2Trezr Help+2User Education Built In
The flow isn’t just “click here, enter things.” It often has prompts, warnings, tips: about not entering seed online, about setting PIN, optionally using passphrase, etc. This helps reduce human error. Trezr+2Teachable+2
What You Need Before Setup
To make the process smooth and safe, prepare the following:
Your Trezor hardware wallet (Model One, Model T, Safe 3, Safe 5, etc.) Trezr Help+1
The USB data cable that came with it (or a good data‑capable cable) Trezr Help+1
A computer (desktop/laptop) with a modern browser (Chrome, Firefox, etc.) or be ready to use the desktop version of Trezor Suite. Trezor FAQ+2Trezure FAQs+2
Stable internet connection (for downloading software, fetching firmware, etc.) Trezor Help+2Trezor FAQ+2
Something to write with (pen) and something to write on (paper or hardware backup cards) to record your recovery seed. Avoid using screenshots or digital storage. Teachable+2Trezr Help+2
Step‑by‑Step Guide: Using trezor.io/start
Here’s what the usual flow looks like when you set up a Trezor wallet via trezor.io/start. The flow may differ slightly depending on your model (One vs. Model T) or when things are updated, but this gives you a thorough idea.
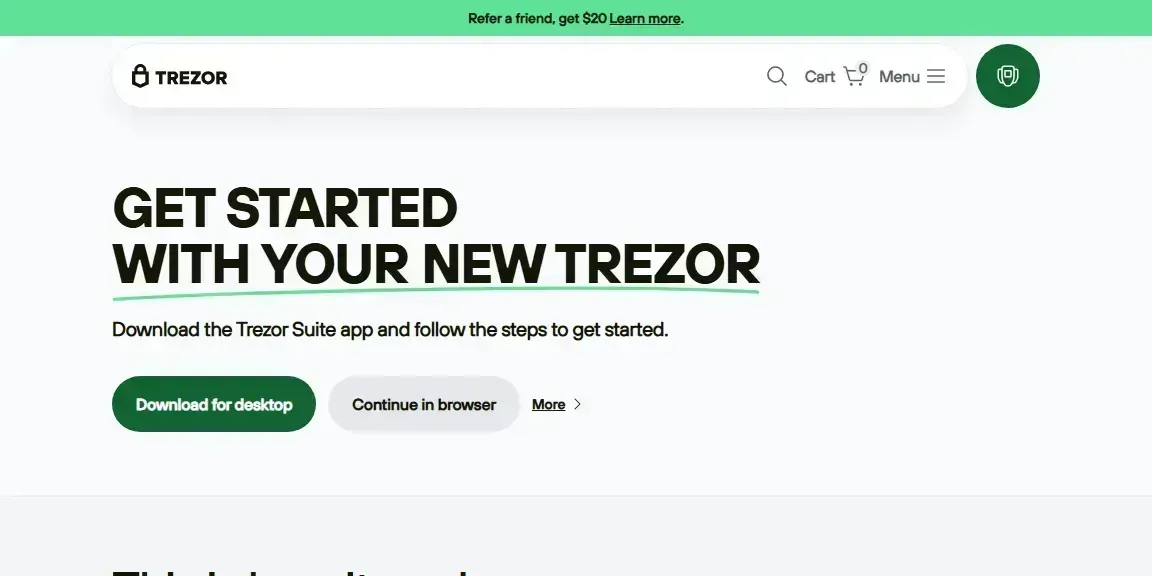
Step 1: Go to the Official URL
Open your browser
Type https://trezor.io/start manually (do not click through emails or ads) Trezr Help+2Teachable+2
Confirm the site is secure (padlock, correct domain) Teachable
Step 2: Download Trezor Suite (Official Software)
From the start page, you’ll get prompts to download Trezor Suite for desktop or use the web version. Desktop is often recommended for full features. Trezor Help+2Trezure FAQs+2
Select the version matching your operating system (Windows / macOS / Linux) Trezor Help+2Trezor FAQ+2
Download and install – follow the installation instructions. Trezor Help+1
Step 3: Connect the Device & Verify Identity
Plug in your Trezor device using the USB cable. On some models or firmware you might need Trezor Bridge (a helper software) to facilitate communication. Trezor Help+1
The software should automatically detect the device. If the device is new, it may have no firmware or an older firmware. If prompted, update the firmware to the latest stable version. Confirm any such prompts on the device itself. Teachable+2Trezor Help+2
Step 4: Create a New Wallet or Recover Existing
You’ll usually get a choice:
Create New Wallet: Generates a new seed (12/18/24 words depending on model), then you’ll set up backup.
Recover Wallet: If you already have a seed (recovery phrase), you can restore it here. Teachable+1
Step 5: Backup the Recovery Seed
This is one of the most critical steps:
You’ll see a series of words (the seed). The device will display the seed; you should write them down in order, on physical medium (paper / backup cards). Do not take photos or store digitally. Teachable+2Trezr Help+2
For models that support Shamir Backup (e.g. Trezor Model T / newer), you may optionally use that to split backup into shares. Teachable+1
After writing, you’ll likely have to verify it – sometimes via random word checks, re‑typing, or confirming on device. Teachable+1
Step 6: Set Up a PIN
Choose a strong PIN. The PIN is needed to unlock the device each time. It protects against someone physically having your device. Teachable+1
On Trezor devices, entering PIN often involves a randomized keypad or matrix to protect against malware/keyloggers. Teachable
Step 7 (Optional but Recommended): Set Up Passphrase
Trezor supports an optional passphrase (sometimes called a 25th word) which acts as extra encryption/protection on top of the seed. This means even if someone has your seed, they can’t access the wallet unless they also know the passphrase. docs--menu--trezor.gitbook.io+1
This is more advanced; you should understand how it works because losing the passphrase means losing access.
Step 8: Start Using the Device
Once setup is complete, you can use Trezor Suite (or web app) to view your accounts, receive addresses, send transactions, etc. Trezor Help+2Teachable+2
Always verify details (receiver address, amount, fees, etc.) on the Trezor device screen before confirming. On‑device confirmation is crucial.
Best Practices & Security Tips
Because mistakes during setup can lead to loss of funds, there are several best practices you should follow:
Always use the official site
Type trezor.io/start manually; bookmark it. Don’t click links from unexpected emails or ads. Teachable+1Verify URL & SSL
The padlock in browser, correct domain. Be alert to typos, slight deviations.Check the box/device packaging
Make sure the hardware device looks genuine, no obvious signs of tampering. Some versions have security assurances like holograms or seals; others rely on software verification. Trezr Help+1Never store seed phrase digitally
Don’t take photos or screenshots. Don’t store in cloud or unencrypted files. Use paper or metal backup.Use a strong, unique PIN
Don’t reuse PINs from elsewhere; don’t choose trivial ones.Firmware updates are essential
New firmware patches often fix security issues. Only accept firmware signed by Trezor.Consider passphrase (if comfortable)
Adds an additional layer of security but adds complexity. If you use it, do not lose it.Small test transaction
When using for the first time, send a small amount to/from the device to confirm everything works as expected.Keep software (Suite or web) up to date
Security software evolves; new vulnerabilities appear, user interface may improve.Backup seed in multiple safe places
If something happens to your backup (fire, loss), having more than one (in secure locations) is wise. But also ensure backups are secure physically.
Common Problems & How to Avoid / Fix Them
Even with everything done “right,” some issues crop up. Here are frequent pitfalls and suggestions.
IssueSolution / What to CheckDevice not recognized by the computerTry different USB port or cable; ensure the USB cable supports data (not just charging); install Trezor Bridge if prompted. Trezor Help+1Firmware update stuck or failsMake sure the device remains connected; check cable integrity; ensure the power is stable; if stuck, restart both device and computer and try again. Follow official Trezor instructions.Seed word verification failsCarefully check you wrote down the words in correct order; re‑try the backup verification process; don’t rush.Confusing seed lengths or backup methodsBe aware that different models (or modes) support different seed lengths (12, 18, 24) or Shamir backup. Pick what’s best for you and stick with it.Losing passphrase or mis‑entering itIf you use passphrase, store that separately and securely. Losing it is akin to losing access.Falling for scams asking for seed or PINTrezor (official) will never ask for your full seed phrase via email/support etc. If someone asks, it's a scam.
Advanced / Additional Features
If you feel comfortable, there are extra features and enhancements you can consider.
Shamir Backup: available on some models, allows splitting the recovery seed into multiple shares; reconstructing the wallet requires some of those shares. Increases safety against physical loss. Teachable+1
Passphrase (Hidden Wallets): as mentioned, you can derive hidden wallets via passphrase. Provides plausible deniability. But managing multiple versions (with and without passphrase) adds complexity.
Open‑source code: Trezor’s firmware and Suite are open source; community review is possible. For users interested in security transparency, this is a plus. Trezr
Using multiple devices / backup devices: If you have more than one Trezor, or plan to manage assets across devices, ensure consistent backups and passphrase usage (if any).
Offline / Air‑gapped signing: For high value wallets, you might use a setup where transactions are built on an online machine but signed on a physically isolated machine. Trezor supports such workflows (with proper tools) in some cases.
Why Onboarding Mistakes Are So Risky
It’s worth pausing to understand what can go wrong and why the onboarding phase is crucial:
If you lose or compromise your recovery seed, you lose access to your crypto forever (or expose it to theft).
If you install malware or fake software at setup, your device could be feeding seed or PIN info to attackers.
If firmware is old or unverified, there may be vulnerabilities.
If you store your seed digitally (phone, computer, cloud), that is often the easiest vector for attackers.
If you misconfigure PIN or passphrase (forget it, etc.), that can lock you out permanently.
Because crypto is irreversible, there’s no “reset” after losing keys. So the onboarding steps at trezor.io/start are designed to guard against those worst‑case failures.
Summary: What trezor.io/start Gives You
Putting it all together, using trezor.io/start gives you:
A secure flow for downloading Trezor Suite, installing firmware, creating or recovering wallets
Strong protection against phishing or fake software
A forced backup process for your recovery seed, ensuring you don’t skip it
Setup of key security features: PIN, optional passphrase, etc.
Clear guidance so even non‑technical users can safely begin using hardware wallet
